I’ll be honest, I’m not much of a terminal power user. I use iTerm2 as my terminal emulator and there are some things I like to customize. And it bugs me how cumbersome it is to enable the ability to switch between words with ⌥ + ← and ⌥ + →.
Apparently, this is actually called backward-word and forward-word. You can see your current setup with:
bindkey -L | grep backward-wordAnd:
bindkey -L | grep forward-word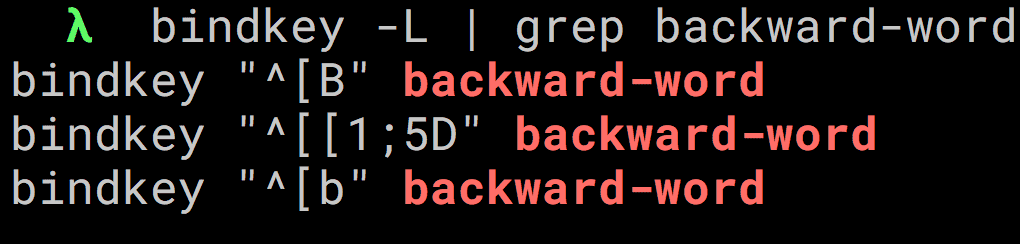
You might even like the defaults. (I doubt it.) Now, you can manually set the binding keys via the terminal of course, but I don’t really get how it’s used and I hate typing out character codes by hand. 🙂
So instead, I’m going to document this method that uses the iTerm2 preferences menu – for future reference to myself and to others who might have the same problem. (Please note that this is specific to this emulator.)
How to Configure backward-word and forward-word in iTerm2
First, in iTerm2, go to Preferences > Profile > Keys.
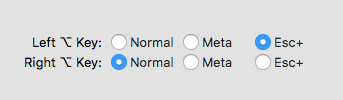
Here you need to set your left ⌥ key to act as an escape character. Or Esc+ as it is written. (See screenshot.)
Then, in your Key Mappings on the same screen, we need to redefine the shortcuts for our desired combination.
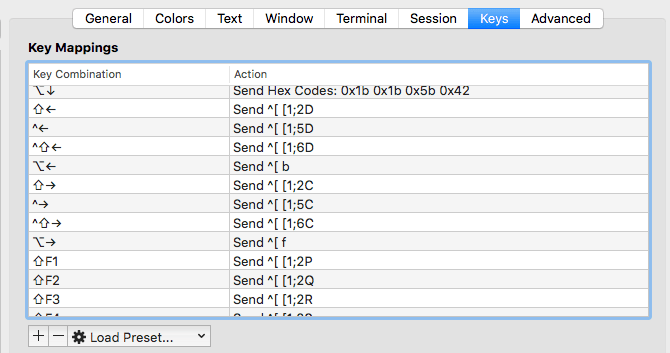
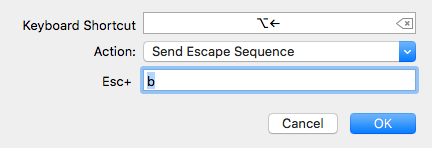
Find the current shortcut for ⌥ + ← (or create a new one), with the following settings:
- Action: Send Escape Sequence
- Esc +: b
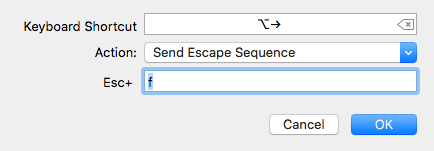
Find or create a shortcut for ⌥ + → as well with:
- Action: Send Escape Sequence
- Esc +: f
And that’s it, happy hacking! 🎉 If you end up having a lot of these presets, it would be a good idea to export and save them somewhere for future use.